Taking your first screenshot with PeekShot is quick and straightforward. This guide walks you through the updated dashboard flow — from sign-up, to capture, to finding your image in the File Manager.
Step 1: Create an Account & Sign In
If you don't have a PeekShot account yet:
Go to the PeekShot dashboard URL.
Choose your sign-up method:
Email & password sign up, or
Continue with Google
Verify your email if prompted.
If you already have an account, simply Sign In using the same method you used to register.
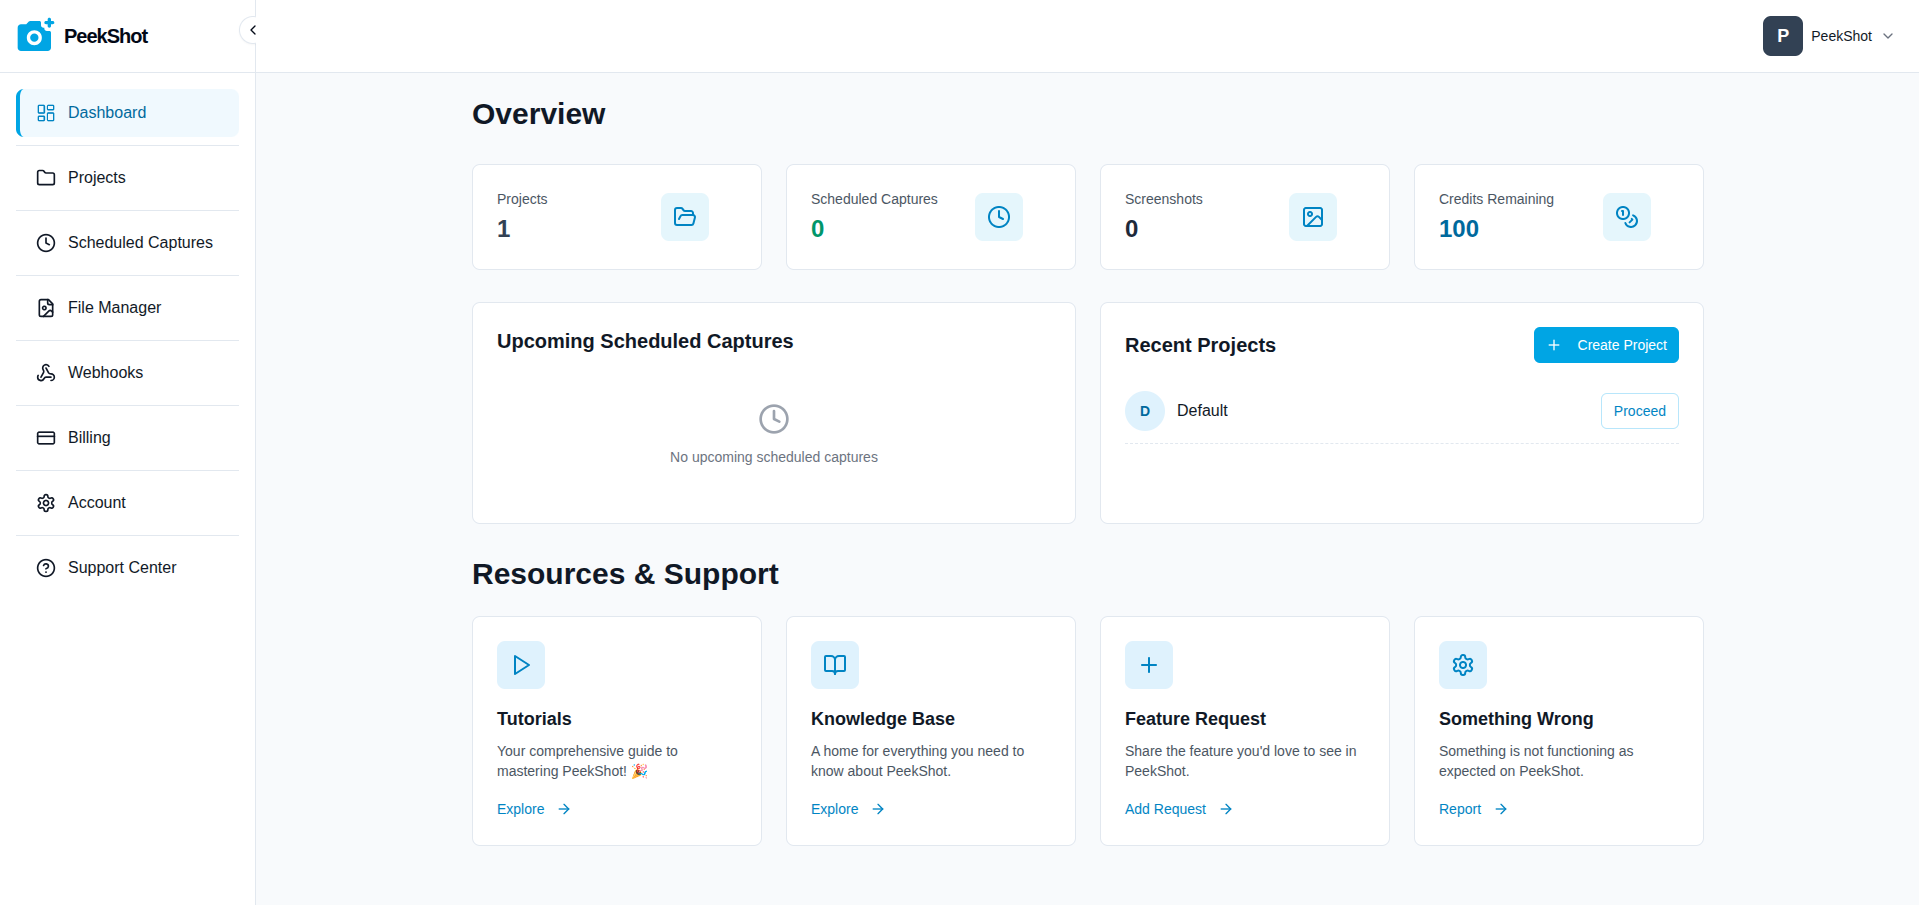
After logging in, you'll land on the Overview dashboard. Here you can see your total Projects, Scheduled Captures, Screenshots, and Credits Remaining.
Step 2: Create Your First Project
Screenshots in PeekShot are always organized inside Projects. If you don't have a project yet, create one first:
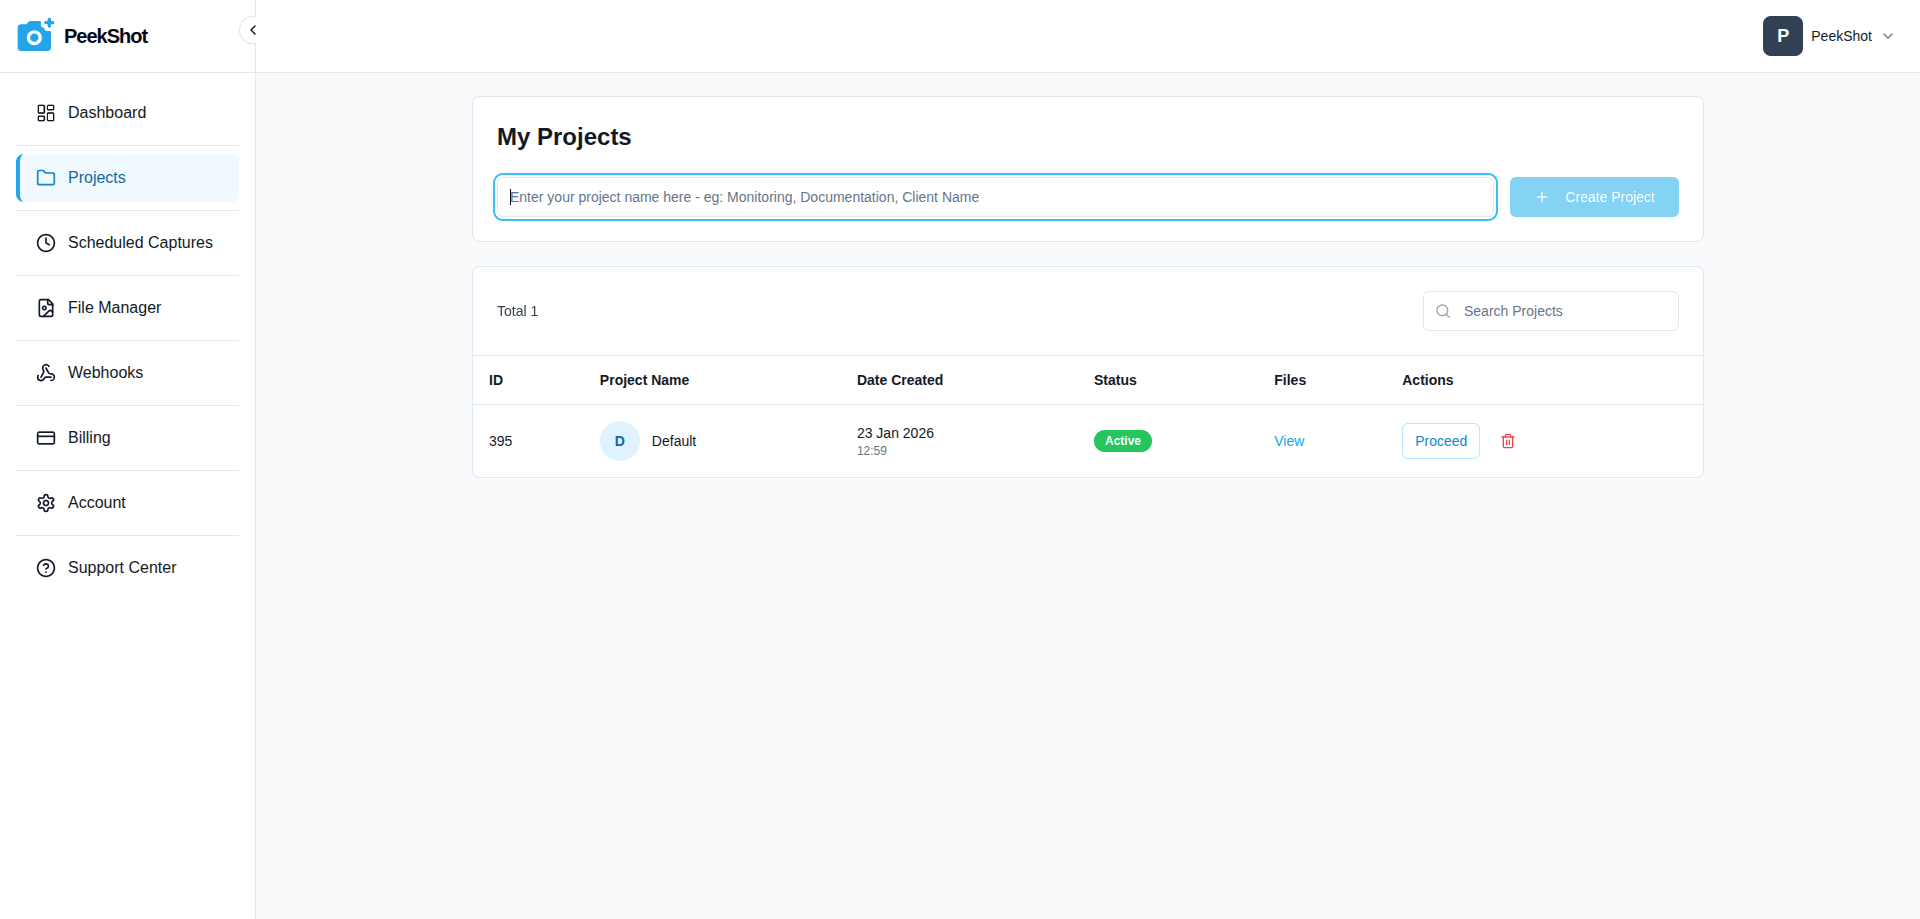
From the sidebar, open Projects.
Use the Create Project button at the top and give your project a descriptive name such as "Marketing Homepage", "Client ABC", or "Staging Environment".
This project will be where your first screenshot is stored.
Step 3: Open the Capture Screenshots Page
To start your first capture, you’ll work from a specific project:
From the sidebar, click Projects.
Find the project where you want to save your screenshot and click the Proceed button.
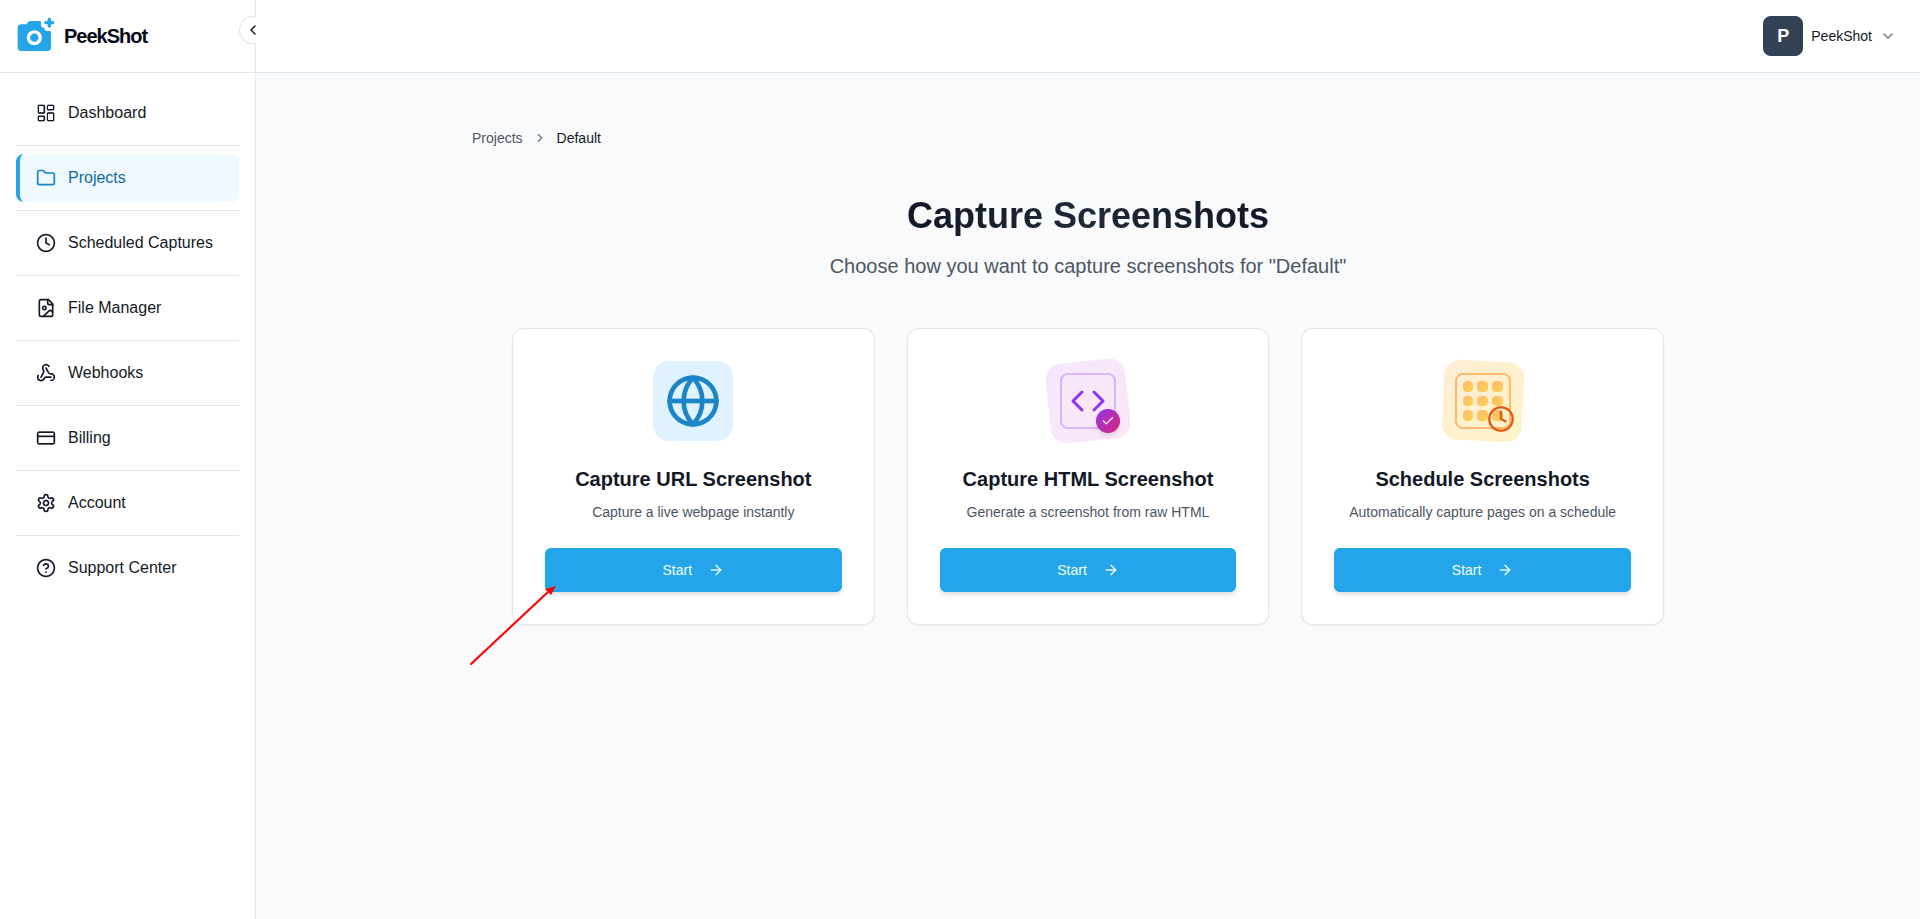
You'll see the Capture Screenshots page with three options: Capture URL Screenshot, Capture HTML Screenshot, and Schedule Screenshots.
Click Start on the Capture URL Screenshot card to open the Capture URL page for that project.
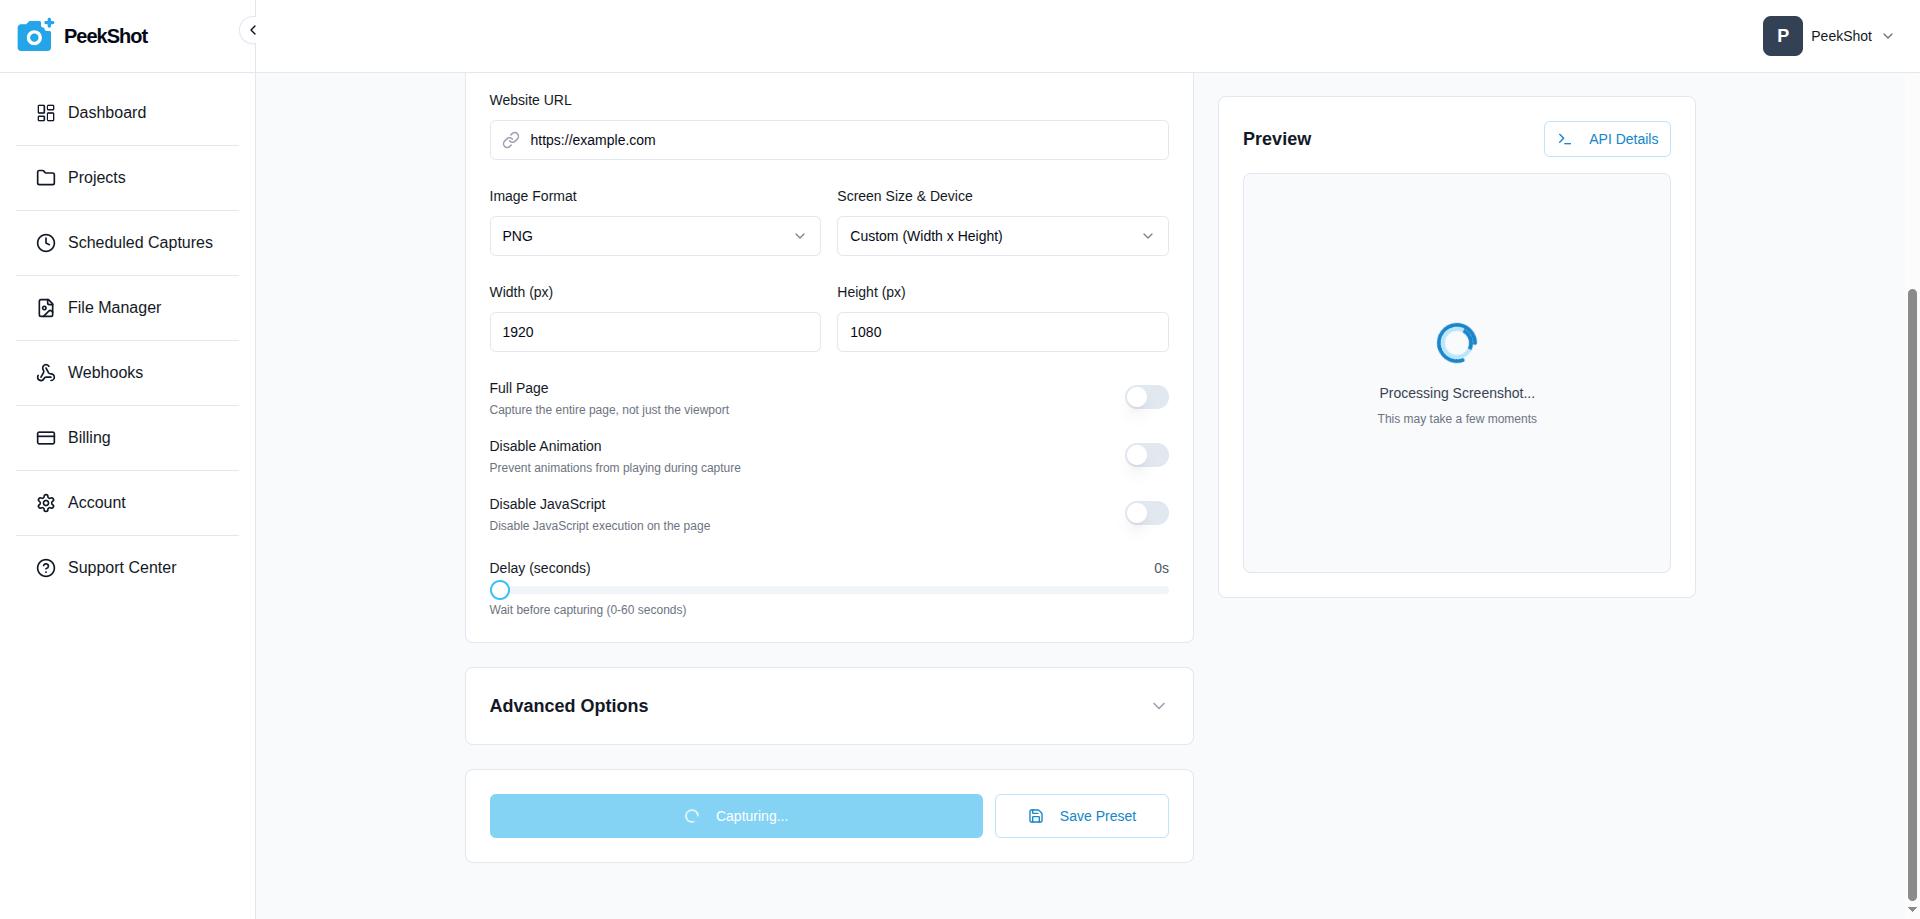
Step 4: Configure Your Screenshot (Basic Options)
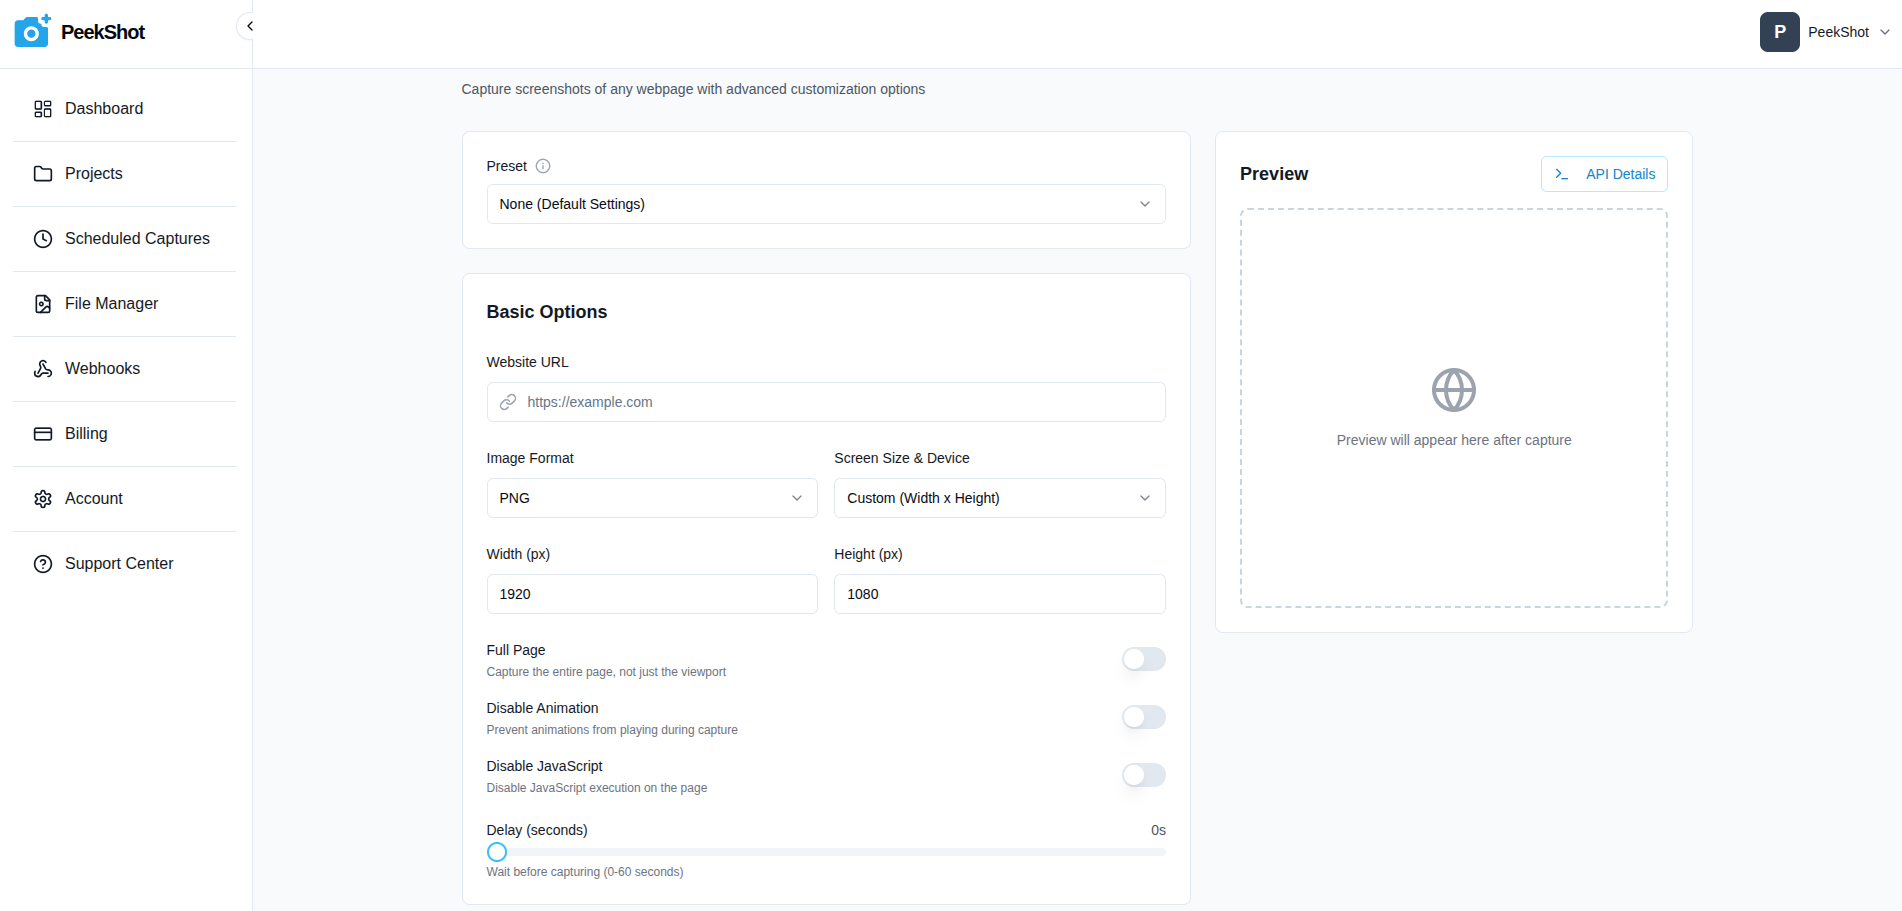
Website URL
In the Capture URL Screenshot page, enter the website you want to capture, for example https://example.com. Make sure the URL is publicly accessible.
Image Format & Device
In the Basic Options card:
Image Format: Choose PNG (best quality, larger file size) or JPG (smaller file size).
Screen Size & Device: Select a predefined device (desktop, tablet, mobile) or choose Custom (Width x Height) and set your own dimensions.
Layout & Behaviour
Full Page: Capture the entire scrollable page instead of only the visible viewport.
Disable Animation: Turn this on to freeze animations and reduce visual noise.
Disable JavaScript: Turn this on if you want a purely static render (no JS execution).
Delay (seconds): Use the slider to wait before capture (0–60 seconds) so the page can finish loading dynamic content.
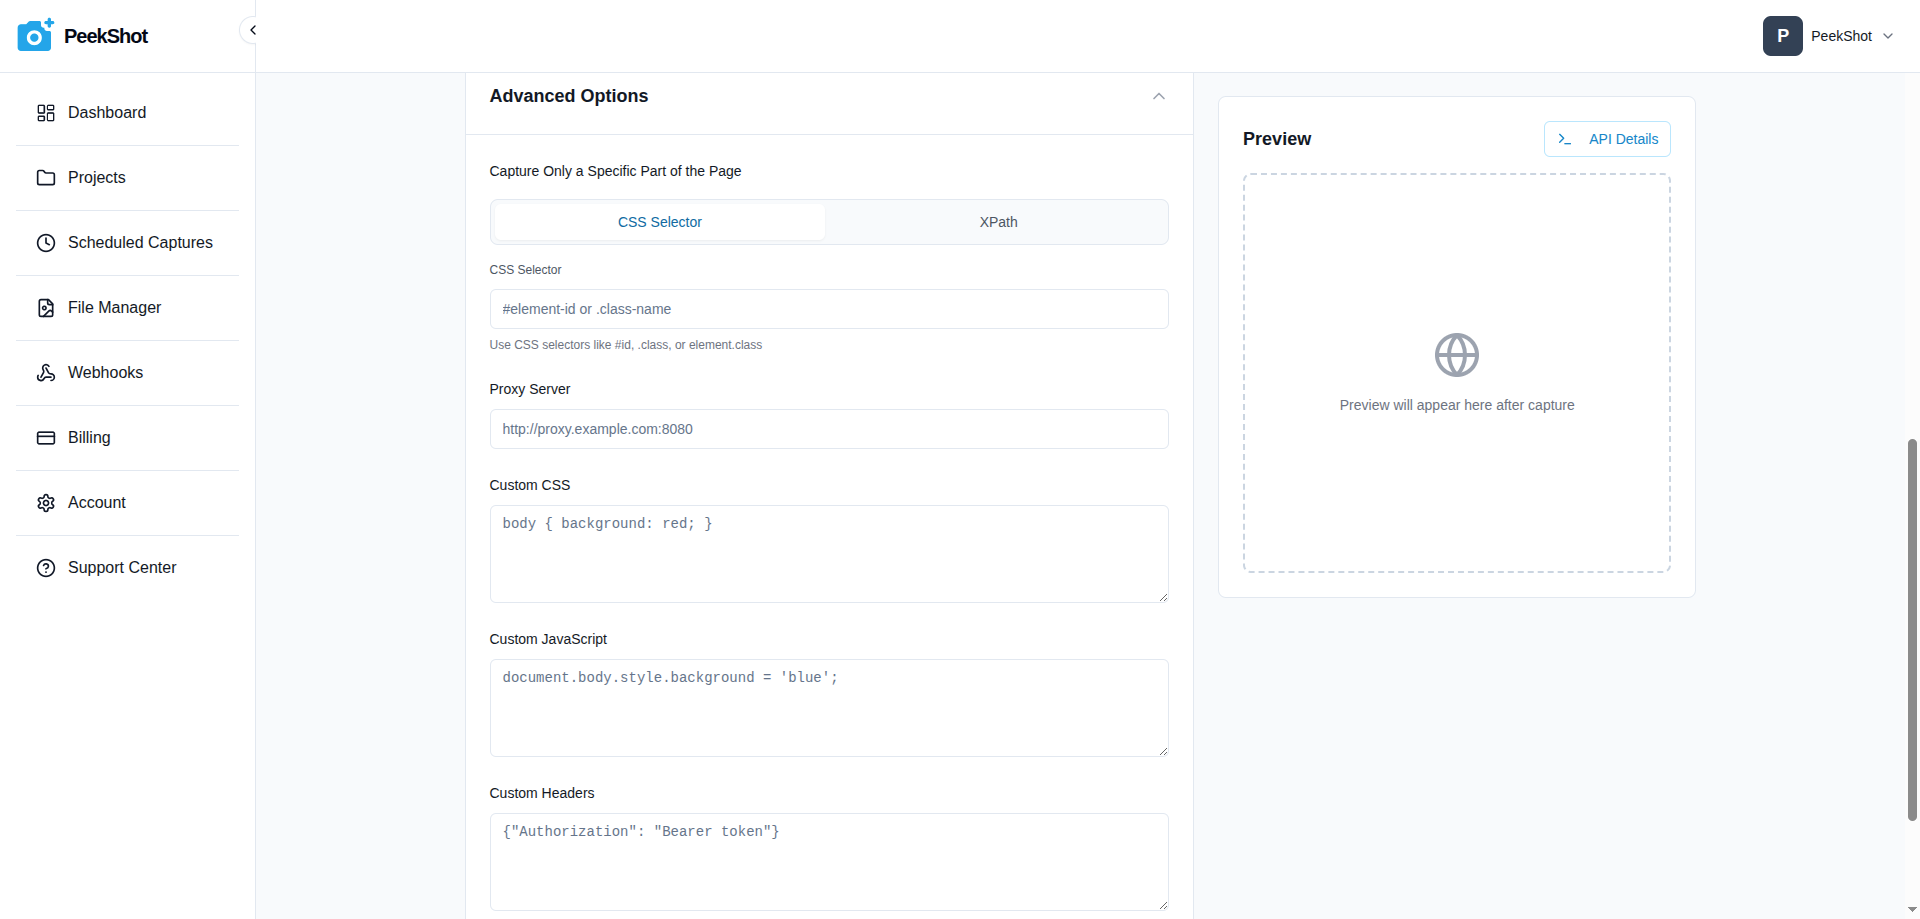
Step 5: (Optional) Use Advanced Options & Presets
If you need more control, expand the Advanced Options section:
Capture Only a Specific Part of the Page: Target a single element using a CSS selector (e.g.
#hero,.pricing-section) or XPath.Proxy Server: Route the request through your own proxy.
Custom CSS: Inject CSS before capture (for example, hide banners or change background colours).
Custom JavaScript: Run JavaScript before capture (for example, open dropdowns or trigger UI states).
Custom Headers: Send extra HTTP headers such as authentication tokens.
If you frequently reuse the same configuration, click Save Preset. Presets remember your format, device, toggles, and advanced options so you can reapply them in one click next time.
Step 6: Capture the Screenshot
When you're ready:
Click Capture Screenshot.
PeekShot will create a capture request using your selected project and options.
You'll see a Processing Screenshot... state in the preview panel while the capture runs.
Once complete, the preview automatically updates to show your screenshot.
From the preview panel you can:
Copy URL: Copy a direct URL to the image to share or use in your app.
Download Image: Download the screenshot as a PNG or JPG file.
Credits are automatically deducted according to your configuration (format, full-page, etc.). You can always see your remaining credits at the top of the Overview page.
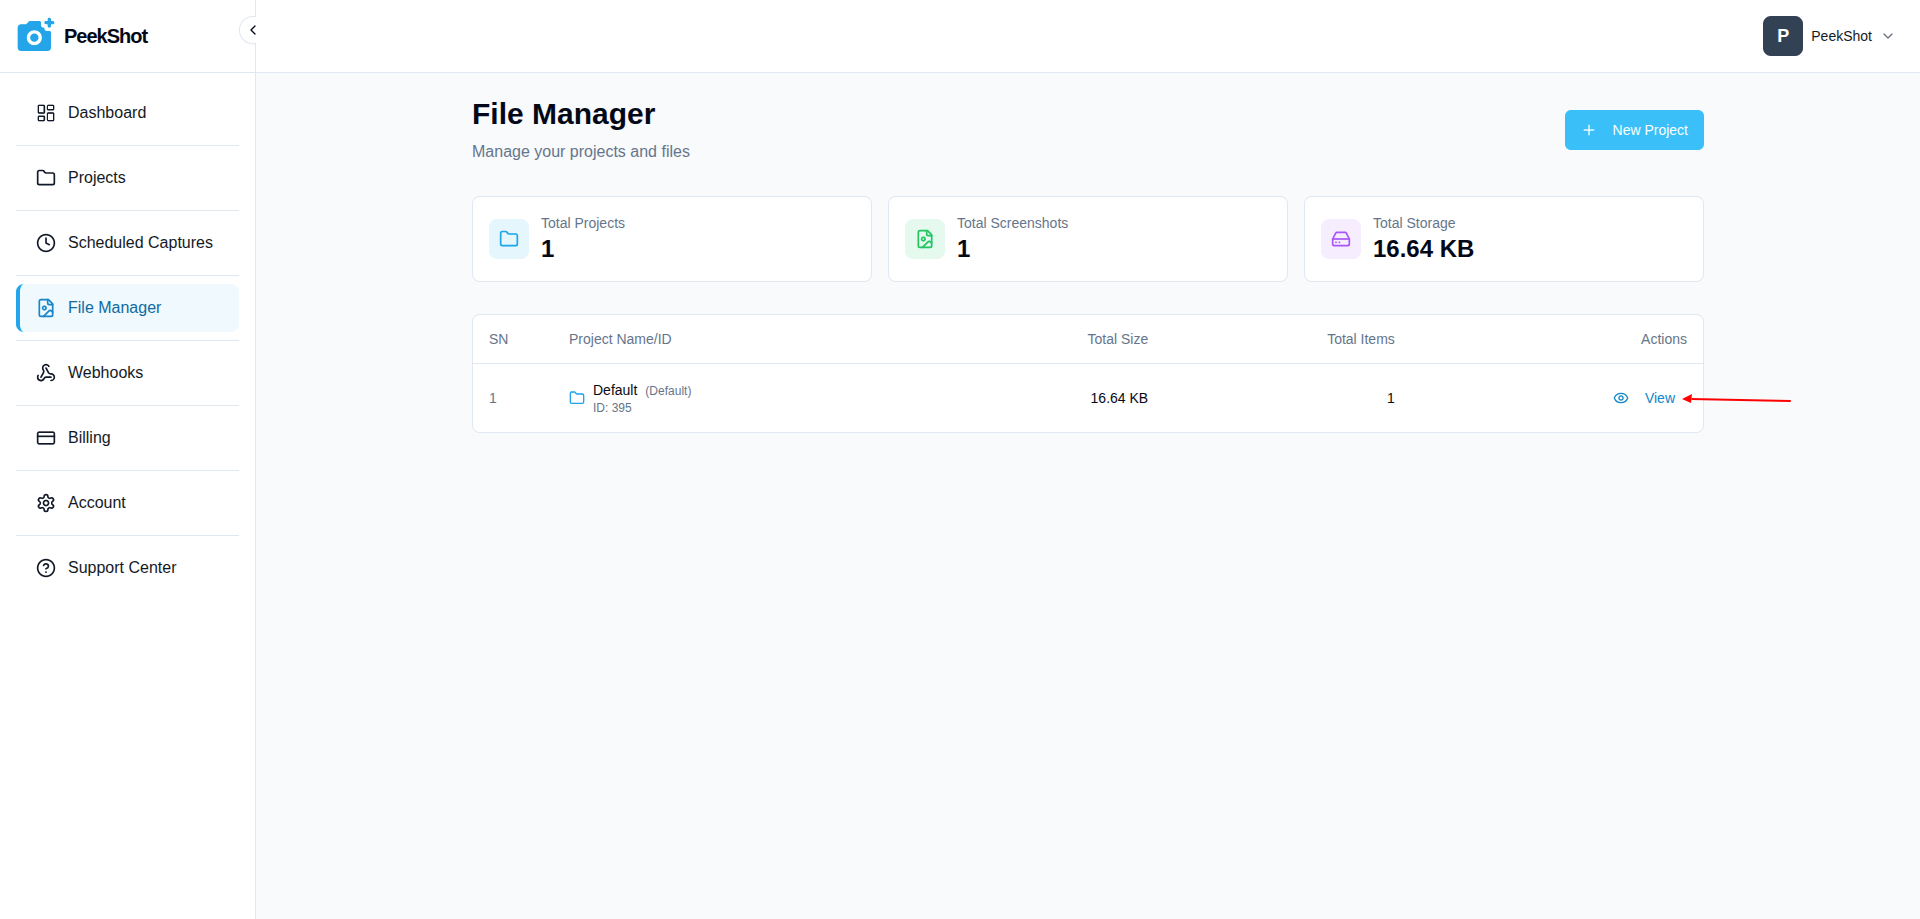
Step 7: Find Your Screenshot in File Manager
Every screenshot you capture is stored inside a project and surfaced in the new File Manager experience:
From the sidebar, open File Manager.
You'll see a list of projects with their Total Size and Total Items.
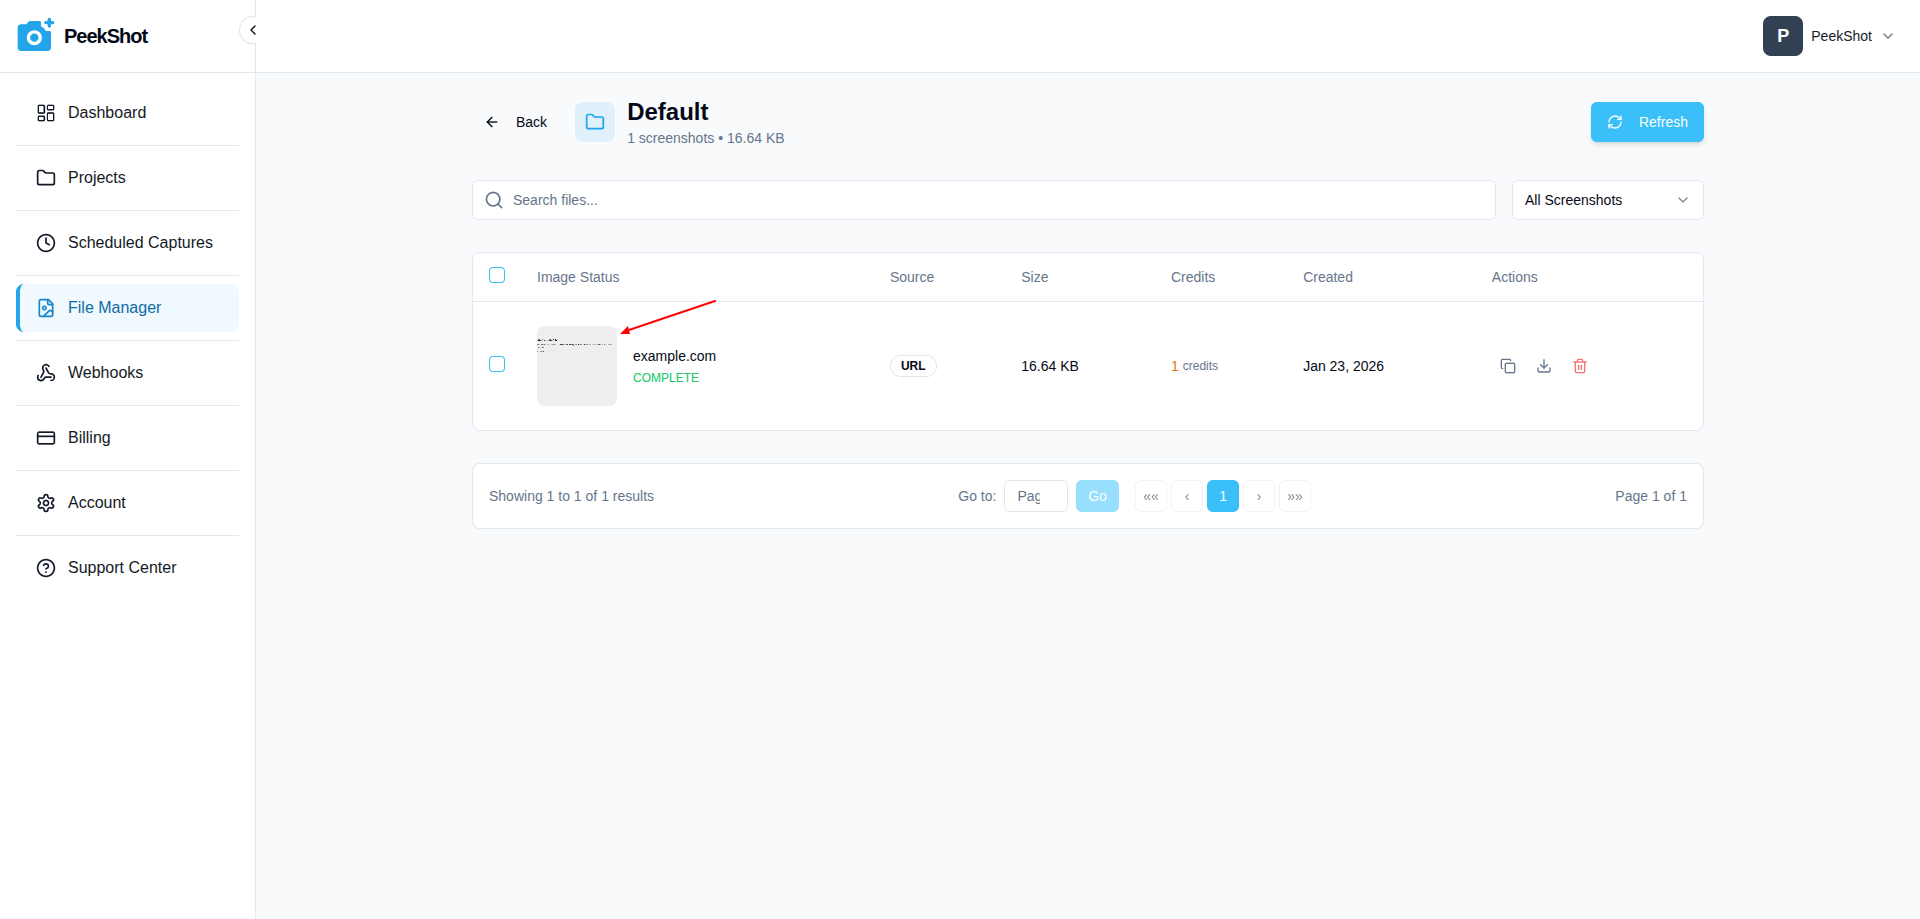
Click View on the project where you captured your first screenshot.
Browse the files in that project, preview images, and download them as needed.
The File Manager gives you a project-level view of your storage usage and screenshot counts, making it easier to manage many captures over time.
Common First-Time Mistakes to Avoid
Invalid URLs: Make sure the URL is publicly reachable and includes the protocol (for example,
https://).No project created: Always create at least one project before capturing so your screenshots have a place to live.
Not using delay for dynamic pages: If parts of the page are missing, increase the delay slider so dynamic content has time to render.
Overusing full-page on tests: Start with viewport-only captures while experimenting to keep credit usage lower.
Forgetting which project you used: Check the File Manager projects list and open the project with the latest Total Items count.
What to Expect
Processing Time
Most screenshots complete within 5–15 seconds, depending on:
Page complexity and load time.
Whether JavaScript is enabled.
Full-page vs viewport-only capture.
Current system load.
Credits
Credits are deducted based on your options, for example:
Standard viewport screenshot: base credit cost.
Full-page capture: uses more credits than viewport-only.
PNG vs JPG: PNG usually results in larger files.
You can see your remaining credits and recent usage on the Overview dashboard. For more details, see How PeekShot Credits Work.
Next Steps
Once you've captured your first URL screenshot, explore more of the updated dashboard:
Use Capture HTML Screenshot to generate images directly from raw HTML. Access it via Projects → Proceed → Capture HTML Screenshot.
Use Schedule Screenshot to set up recurring captures (daily, weekly, or monthly). Access it via Projects → Proceed → Schedule Screenshots.
Manage all results by project from the File Manager (accessible from the sidebar).
Visit Support Center from the sidebar if anything doesn't behave as expected.